
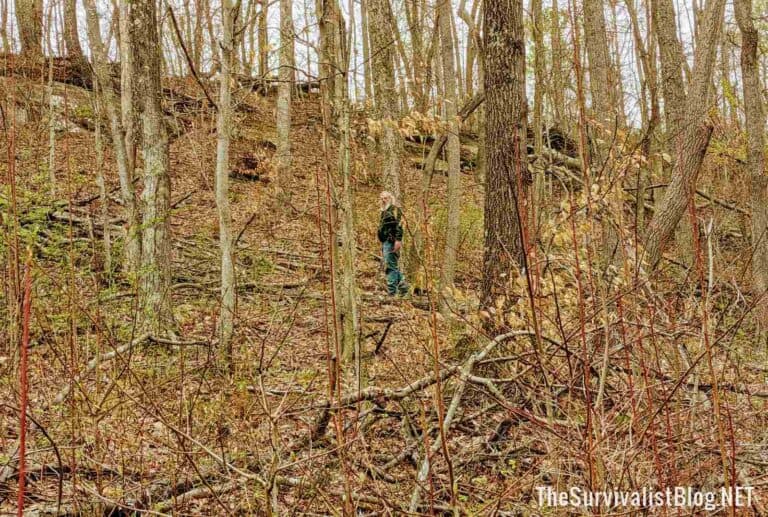
Here’s How to Survive in the Woods
Civilization
has
come
a
long
way
from
the
days
when
living
outside
was
commonplace.
These
days
you
see
outdoor
adventures
planned
for
with
grand
ideas
of
accomplishing
personal
goals
and
reconnecting
with
the
natural
world.

The
comforts
of
home
may
have
dulled
our
understanding
of
what
it
is
like
to
survive
in
the
woods.
A
lot
of
the
information
in
this
guide
will
work
year-round;
however,
it
is
geared
towards
surviving
in
woods
that
fall
into
the
Carolinian
and
boreal
forest
zones.
These
would
include
trees
such
as
maples,
oaks,
beeches,
pines,
and
spruce
trees.
Depending
on
the
time
of
year
and
your
location
you
will
have
to
make
adjustments
to
your
strategy
and
gear.
Individuals
from
other
climates
will
be
able
to
use
the
majority
of
this
knowledge
as
well.
While
having
beneficial
items
and
tools
will
help
your
survivability
rate
in
the
woods,
sometimes
you
have
to
use
the
natural
resources
around
you
to
supplement
or
replace
an
existing
tool.
A
good
thought
to
keep
in
your
mind
is
that
a
lot
of
the
tools
we
use
today
were
modeled
after
natural
tools,
as
thus,
you
can
recreate
almost
anything
you
use
today
(primitively,
of
course).
Different
scenarios
call
for
different
strategies
when
it
comes
to
surviving
in
the
wilderness.
Some
of
the
situations
in
which
people
have
to
survive
in
the
woods
include:
-
An
errant
hiker
getting
turned
around
and
eventually
getting
lost -
A
backcountry
trip
where
you’ve
lost
your
way -
Vehicular
breakdown
in
the
middle
of
nowhere -
Deciding
to
sell
everything
and
live
off-grid
It’s
a
good
idea
to
have
a
small
emergency
kit
with
some
essentials
to
help
support
you
while
you
establish
your
tactics,
and
an
inventory
of
what
you
have
and
need
to
survive
for
an
undetermined
amount
of
time.
Table
of
Contents
The
Power
of
Your
Fight
or
Flight
Instincts
Whether
incidental
or
planned,
surviving
in
the
woods
is
always
a
mental
battle
along
with
the
physical.
We
have
certain
mechanisms
within
us,
usually
driven
by
instinct,
that
our
nervous
system
will
fall
back
on
in
times
of
crisis.
This
can
be
managed
with
a
few
practices
and
the
realization
that
humans
have
been
doing
this
since
the
beginning
of
time
and
that
the
natural
world
has
an
abundance
of
resources
that
we
can
use
to
keep
us
well.
In
the
circumstance
of
getting
lost
in
the
woods,
the
fight
or
flight
mechanic
is
strong.
This
is
because
we
are
not
accustomed
to
not
knowing
where
we
are.
Couple
this
with
a
reliance
on
the
current
societal
systems
and
you
could
think
you
are
in
big
trouble.
The
important
thing
to
do
in
this
scenario
is
to
sit
down
and
breathe.
Taking
a
few
minutes
to
gather
your
racing
thoughts
allows
your
body
to
relax,
and
muscles
to
unclench.
This
allows
your
brain
to
start
thinking
in
a
rational
sense
instead
of
in
fear
and
panic
that
you
initially
felt.
Once
you
have
come
to
terms
with
your
situation,
it
is
ideal
to
take
stock
of
the
inventory
you
have
on
hand.
This
includes
things
such
as
food,
water,
extra
clothing,
heat
and
light
sources,
cutting
tools,
and
first
aid
equipment.
If
you
are
planning
to
live
out
in
the
woods
then
your
mental
battle
will
be
a
little
different.
Instead
of
the
fear
of
not
being
able
to
provide
for
yourself
in
the
short
term,
yours
becomes
a
long-term
battle.
Keeping
yourself
grounded
and
ready
for
the
changing
seasons
is
how
you’ll
navigate
this
new
landscape
of
living.
Prepping
months
in
advance
and
identifying
natural
resources
at
key
times
of
the
year
are
your
paths
to
success.
Essentials
of
Surviving
in
the
Woods
Regardless
of
the
climate
or
area,
there
are
some
basic
needs
that
need
to
be
met
in
order
for
you
to
survive
in
the
woods.
Without
water,
fire,
shelter,
or
food
you
won’t
make
it
very
long,
even
less
if
conditions
are
adverse
or
you
have
underlying
medical
conditions
that
need
attention.
Those
four
items
should
be
your
first
priorities
when
planning
how
to
survive
in
the
woods
and
luckily,
in
many
temperate
climates,
these
can
be
met
with
ease
as
long
as
you
know
the
signs.
Let’s
take
a
look
at
each
of
the
necessities
for
surviving
in
the
woods
in
more
detail.
Water
Regardless
of
if
you
are
in
a
survival
situation,
or
are
looking
to
survive
in
the
woods,
it
is
imperative
that
you
find
a
source
of
clean
water
that
you
have
access
to
for
refilling
your
supply.
The
human
body
can
only
go
a
few
days
without
water
and
even
before
that
threshold,
your
cognitive
and
physical
actions
can
be
limited
by
a
lack
of
this
life-sustaining
substance.
Setting
up
camp
near
a
water
source
has
several
benefits
for
someone
looking
to
survive
in
the
woods.
First,
you
will
always
be
near
water
for
drinking
and
cleaning
purposes
which
saves
you
on
using
energy
to
haul
water
back
to
your
camp.
The
second
and
less
thought-about
benefit
is
that
animals
tend
to
gather
near
water
sources
as
well,
which
can
help
you
later
on
with
getting
food
for
yourself.
There
are
some
things
to
note
when
searching
out
water
sources,
these
include:
-
Clear
water
and
clean
water
aren’t
necessarily
the
same
thing.
If
nothing
is
growing
in
the
water
or
you
see
no
signs
of
life,
steer
clear. -
Water
can
have
things
such
as
fecal
runoff,
dead
animals
upstream,
or
campers
who
don’t
know
how
to
clean
up
for
themselves
after
using
the
washroom. -
Finding
a
spring
is
a
great
way
to
get
water,
but
you
should
still
filter
it
as
chemicals
could
have
leached
into
the
source.
Always
have
a
couple
of
backup
water
filtration
systems
so
that
you
can
purify
the
water
without
having
to
guess
if
the
source
has
been
tainted
or
not.
Iodine
Tablets
Iodine
is
a
powerful
antiseptic,
and
has
been
used
throughout
history
for
sterilizing
wounds,
cleaning
tools,
and
water
purification.
This
kind
of
water
filtration
usually
comes
with
two
tablets,
one
of
which
is
iodine
and
the
other
is
a
vitamin
C
tablet.
Let
the
iodine
tablet
work
for
about
30
minutes
in
your
water
container
and
then
add
the
vitamin
C
tablet
to
eliminate
the
iodine
taste.
It’s
a
small
system
with
a
powerful
effect
which
makes
it
great
to
store
in
an
outdoor
kit.
Personal
Water
Filter
The
Lifestraw
is
a
good
example
of
a
membrane-style
filter
that
doesn’t
let
things
like
microplastics,
bacteria,
and
protozoa.
One
of
the
main
draws
towards
a
product
like
Lifestraw
is
the
no-hassle
use
concept.
You
can
put
the
filter
right
in
the
water
and
drink
directly
from
the
source.
Ultraviolet
(UV)
Light
Commonly
used
in
residential
homes
or
as
a
final
step
in
reverse
osmosis
filtration,
UV
light
is
designed
to
kill
all
viruses
and
pathogens
in
the
water.
The
light
penetrates
the
organisms
and
destroys
them
at
the
cellular
level
and
has
proven
effective
at
purifying
water
in
all
situations
without
the
use
of
chemicals.
Wilderness
survival
equivalents
come
in
a
stick
form,
and
the
idea
is
to
swirl
the
device
around
in
your
water
bottle
to
purify.
The
downside
is
the
portable
UV
lights
can
only
purify
small
quantities
of
water,
which
makes
large-scale
water
purification
either
tedious
or
potentially
harmful
if
you
don’t
manage
to
disinfect
all
of
the
water.
Gravity
Water
Filters
If
collecting
large
amounts
of
water
for
filtration
is
your
strategy,
either
due
to
availability
or
other
factors,
then
a
gravity
filter
is
an
option
you
might
be
interested
in.
This
type
of
system
consists
of
a
large
collection
bag
with
a
membrane-style
water
filter
attached.
You
fill
the
large
reservoir
bag
with
water
from
your
source,
hang
it
on
a
tree
or
other
object
above
the
height
of
the
actual
filter,
and
gravity
will
push
the
water
through
the
filter
and
into
your
desired
container.
Gravity
water
filters
like
this
come
in
volumes
upwards
of
10
liters.
While
this
is
a
lot
of
water
that
can
sustain
you
for
a
few
days,
it
is
also
extremely
heavy.
Keep
this
in
mind
if
your
water
source
is
at
the
bottom
of
a
hill
or
other
physical
hazards
that
could
make
it
difficult
to
haul
that
much
water
back
to
camp.
These
are
some
of
the
items
you
can
have
on
you
depending
on
what
the
situation
needs.
As
a
rule
of
thumb,
you
should
always
bring
a
backup
filter
or
purifying
system.
A
combination
of
both
a
membrane-style
filter
and
iodine
tablets
could
be
handy
in
multiple
situations.
Remember,
you
want
tools
and
gear
that
work
in
a
variety
of
situations.
Now,
if
for
some
reason
you
don’t
have
any
kind
of
water
filtration
equipment
on
your
person
and
you
need
a
way
to
get
some
water,
these
tips
can
help
in
a
pinch.
Boiling
Water
This
is
the
most
common
and
effective
way
to
purify
your
water
in
any
situation.
Bring
the
water
to
a
boiling
point
and
let
it
boil
for
5
minutes.
This
will
destroy
any
pathogens
and
bacteria
that
can’t
handle
heat
that
high.
It
is
also
an
effective
means
of
disinfecting
bandages
for
medical
situations.
Ensure
you
have
a
container
on
you
that
can
handle
boiling
water
(such
as
a
metal
camp
pot
or
cup).
Titanium
is
excellent
for
boiling
water
because
you
can
sit
it
inside
fire
for
faster
boiling
and
it
cools
down
really
quick
to
something
like
stainless
steel.
Solar
Still
This
method
of
purifying
water
uses
the
sun
to
create
evaporation
and
condensation
to
produce
clean
water.
The
general
idea
is
to
use
a
container
with
a
surface
that
absorbs
sunlight
(black
is
the
best
color)
and
to
fill
it
with
water
from
your
source.
Then,
using
either
glass
or
plastic,
cover
the
container
so
that
the
sun
can
get
through.
You’ll
start
to
see
water
droplets
appear
on
the
glass
or
plastic
that
you
used
and
that’s
a
positive
sign
of
the
process
working.
The
water
in
your
container
will
evaporate
and
when
it
hits
the
surface
of
your
covering,
will
cool
down
and
condense.
Since
only
the
water
will
evaporate,
this
leaves
the
unwanted
stuff
in
the
container
and
only
purified
water
in
the
droplets.
You
can
then
transfer
the
condensation
to
another
container
and
you
will
have
fresh,
purified
water.
Sphagnum
Moss
Generally
found
in
the
northern
hemisphere,
sphagnum
soss
is
one
of
those
hidden
treasures
in
the
woods.
You
can
find
it
near
bogs
and
other
marshland
types,
which
is
ironic
since
wetlands
are
what
purifies
the
water
that
flows
into
our
lakes
and
rivers.
Sphagnum
moss
is
antiseptic
because
of
its
large
concentration
of
iodine,
which
is
used
as
a
product
to
purify
water.
So
that
means
that
any
water
within
the
moss
is
also
purified
and
safe
to
drink.
Moss
is
also
excellent
at
filtering
out
large
sediment
which
makes
for
an
unpleasant
thirst
quencher.
This
is
more
of
a
survival
product
than
a
sustainable
way
to
get
water
but
it’s
worth
mentioning
because
if
you
are
surrounded
by
stagnant
swamps
and
you
see
some
sphagnum
moss,
you
can
pick
it
up
and
squeeze
a
refreshing
drink
out
of
it.

swamp
in
the
woods
This
is
great
if
you
are
traveling
or
haven’t
found
a
location
yet
for
setting
up.
Finding
Clean
Water
Sources
Sometimes
you’re
dealt
a
poor
hand
in
terms
of
water
scarcity
and
quality
and
have
to
make
due
with
what’s
around
you.
Here
are
some
tips
to
help
you
make
an
informed
decision
on
where
to
collect
water
from
when
surviving
in
the
woods:
-
Usually,
water
sources
that
are
flowing
fast
(such
as
creeks
or
rivers)
are
the
best
to
get
your
water
from.
This
ensures
there
is
no
stagnant
water
for
bacteria
and
algae
to
grow. -
Never
drink
from
swamps
or
any
wetland
in
general.
These
are
decomposition
sites
for
plant
material
that
produce
a
variety
of
dangerous
bacteria
and
pathogens
that
you
don’t
want
in
your
system. -
Don’t
drink
water
directly
from
the
ocean.
The
salt
content
is
incredibly
high,
and
will
actually
make
you
more
thirsty,
eventually
dehydrating
you.
burning
fire
in
the
woods
Fire
Building
and
maintaining
a
fire
is
not
an
easy
task,
especially
in
changing
climate
conditions
and
temperature
variations.
However,
with
a
few
basic
abilities
and
tools,
it
doesn’t
have
to
be
a
daunting
task.
Fire
is
important
to
the
survivalist
because
of
what
it
provides,
both
physically
and
mentally.
It
can
cook
your
food,
boil
your
water,
and
keep
you
warm
for
sure,
but
that’s
not
all
it
does.
Historically,
fire
has
been
a
morale
booster
for
the
lone
person
trying
to
make
it
in
the
wilderness.
It
brings
a
sense
of
comfort
in
the
way
that
it
protects
from
predators
and
staves
off
the
cold
chill
on
a
winter
night.
One
of
the
first
steps
in
creating
a
long-lasting
fire
for
your
camp
is
to
look
for
the
right
fuel
source.
In
the
case
of
surviving
in
the
forest,
that
fuel
source
would
be
wood.
Finding
the
Right
Trees
Not
all
fires
are
created
equal
and
that
goes
the
same
for
the
wood
that
you
use
to
fuel
it.
One
skill
set
every
outdoor
enthusiast
should
learn
is
how
to
identify
dead
trees.
Dead
trees
make
for
excellent
fuel
for
fires
because
they
don’t
have
much
moisture
locked
within
the
trunk.
If
you
ever
try
to
burn
“green”
or
live
trees
you’ll
often
find
that
the
fire
it
produces
tends
to
be
difficult
to
start
up,
and
once
you
get
it
going,
will
smolder
or
not
stay
hot
as
long.
This
is
due
to
the
moisture
locked
within
the
tree
from
it
transporting
water
up
through
the
trunk.
Your
fire
will
have
to
burn
through
all
of
this
moisture
to
actually
catch
the
wood.
There
are
some
general
rules
to
understand
when
identifying
dead
standing
trees,
these
include:
-
Trees
that
are
standing
but
missing
large
sections
of
bark
are
generally
dead -
If
you’re
in
doubt,
knock
something
hard
against
the
tree
and
listen.
If
it’s
a
hollow
knock
then
you
have
a
good
chance
that
it’s
dead.
If
it
sounds
muffled
or
like
the
sound
is
being
absorbed
then
it’s
either
alive
or
really
rotted
on
the
inside. -
Try
not
to
use
fallen
trees
if
it
has
been
raining
for
a
few
days
as
they
will
absorb
the
water
from
both
the
rain
and
the
ground.
Over
time
they
will
rot
and
become
punky.
What
Types
of
Wood
Are
the
Best
For
Fires?
You
can
use
any
combination
of
wood
types
to
get
a
great
fire
going.
There
are
two
types
of
wood
that
you’ll
be
working
with
to
get
your
fire
built,
soft
and
hardwoods.
Softwood
comes
from
coniferous
trees
and
is
great
to
get
your
fire
started
as
they
are
rich
in
fire-starting
resin.
If
you
are
able
to
find
dry,
resinous
trees
then
your
fire-starting
job
becomes
really
easy.
Trees
to
look
out
for
are:
-
Eastern
White
Cedar
(Thuja
occidentalis)
is
a
softwood
that
is
perfect
for
fires.
Not
only
is
it
rot-resistant
and
incredibly
light
to
carry.
It
also
burns
very
hotly,
very
quickly.
It
also
has
a
nice
light
peppery
smell
when
burning
(which
adds
to
the
morale-boosting
aspects). -
White
Pine
(Pinus
strobus)
is
plentiful
across
the
northern
hemisphere
and
provides
a
good
fire-burning
wood
that
is
both
hot
and
soothing
to
the
senses. -
Red
Pine
(Pinus
resinosa)
is
another
common
softwood
tree
that
can
provide
a
really
quick
and
warm
fire
with
its
resin-impregnated
wood.
When
burning
hardwood
you’ll
find
that
it
takes
a
little
longer
to
get
the
fire
going
but
it
will
eventually
work
its
way
up
to
a
hot
fire
that
will
keep
for
a
significantly
longer
amount
of
time
than
softwoods.
This
is
the
type
of
wood
you
want
to
go
after
for
logs
that
will
burn
during
the
night,
so
you
don’t
have
to
stoke
the
fire
as
often
to
stay
warm.
Popular
hardwoods
that
you’ll
come
across
are:
-
Red
or
White
Oaks
is
a
dense,
heavy
wood
that
will
burn
for
an
extended
time. -
Maple
trees
are
another
hardwood
that
burns
really
hot
and
keeps
the
heat
longer. -
White
Birch
(Betula
papyrifera)
is
a
dense
hardwood
that
has
the
additional
benefit
of
papery
bark
to
jumpstart
your
fire.

birch
(Betula
papyrifera)
A
good
combination
of
softwoods
and
hardwoods
would
be
ideal
to
get
your
fire
started.
Commonly,
people
will
start
their
fire
with
something
like
white
pine
to
get
it
hot
and
then
add
the
hardwood
to
continue
the
fire
while
extending
the
burn
time
substantially.
Once
you
get
your
fire
down
to
the
coals
you
can
throw
whatever
wood
you
want
as
the
fire
will
sustain
itself.
Building
Your
Fire
One
of
the
common
problems
that
beginners
have
with
building
a
fire
is
that
it
can
get
smothered
pretty
quickly
if
it’s
not
hot
enough.
This
happens
when
you
put
too
much
wood
on
your
fire
before
it
has
enough
time
to
get
going.
It
can
be
frustrating
to
put
a
lot
of
work
into
getting
the
materials
prepared
but
then
having
the
fire
fizzle
out
from
a
lack
of
oxygen.
It’s
even
more
disheartening
to
have
your
precious
tinder
get
used
up
in
the
process.
Fire
requires
three
things
to
come
into
existence:
ignition,
oxygen,
and
fuel.
A
balance
of
all
of
these
things
will
ensure
your
success
in
creating
and
sustaining
a
fire.
As
such,
the
process
to
start
your
fire
should
begin
very
small
and
end
where
you
have
a
manageable
heat
source
that
you
can
easily
maintain.
It
is
wise
to
begin
your
fire
prepping
activities
by
looking
for
kindling
in
the
form
of
small
twigs,
about
the
size
of
pencil
lead.
Work
your
way
up
through
pencil-sized,
small
branches,
medium
branches,
and
eventually
logs.
Introducing
each
level
of
wood
size
when
the
fire
is
strong
enough
to
handle
it
will
build
up
your
fire
with
minimal
chance
of
snuffing
it
out.
High-Quality
Tinder
Makes
Starting
Fires
Easy
Tinder
is
an
important
item
for
your
fire
kit
and
can
be
found
in
many
different
forms,
both
commercial
and
out
in
the
wilderness.
If
you’re
the
crafty
type
then
you
can
make
your
own
tinder
and
bring
it
with
you.
Since
birch
bark
is
an
obvious
choice
and
is
easily
found
in
the
northern
hemisphere,
looking
at
other
sources
of
tinder
that
you
can
either
bring
in
with
you
or
that
can
be
found
in
the
forest
will
be
beneficial
to
your
arsenal
of
fire
creation
tools.
Cotton
Balls
and
Petroleum
Jelly
Cotton
balls
and
petroleum
jelly
is
common
homemade
tinder
that
is
efficient,
inexpensive,
and
easy
to
pack
away.
Cotton
balls
are
extremely
flammable
and
petroleum
jelly
slows
down
the
burning
process
so
that
you
have
enough
time
to
get
some
kindling
onto
the
flame.
Fatwood
Look
no
further
for
the
perfect
tinder
to
start
your
fire.
You’ll
be
able
to
find
fatwood
inside
dead
pine
stumps
or
on
damaged
parts
of
pine
trees.
The
tree
will
send
resin-rich
sap
to
damaged
areas
to
seal
them
off
from
insects
who
might
capitalize
on
getting
inside.
When
a
pine
or
spruce
tree
is
cut
down,
the
roots
will
continue
to
pump
sap
into
the
stump,
and
as
it
hardens
you
get
a
waxy
texture
to
the
wood
that
is
both
flammable
and
waterproof.
All
you
have
to
do
is
shave
some
of
the
wood
with
your
knife
and
light
with
your
preferred
method.
While
the
fatwood
is
generally
better
than
pine,
spruces
also
produce
a
flammable
pitch.
Starting
Your
Fire
Ferrocerium
Rod
Ferrocerium
is
a
metal
alloy
that
causes
sparks
when
struck
with
another
metal.
These
sparks
can
reach
upwards
of
5,000
degrees
Fahrenheit
(2760
degrees
Celsius).
They
come
with
a
black
coating
that
needs
to
be
scraped
off
before
use.
Don’t
confuse
a
Ferro
rod
for
a
magnesium
bar
as
they
aren’t
the
same
thing.
The
idea
is
to
scrape
little
shards
of
the
metal
onto
your
tinder,
and
then
light
it
by
striking
the
bar
with
a
metal
object
to
ignite
the
pile
of
metal
shavings
and
start
your
fire.
Make
A
Friction
Fire
With
A
Bowdrill
This
method
of
starting
a
fire
is
primitive
in
nature
and
requires
a
lot
of
patience
and
consistency.
Instead
of
using
a
flame
or
Ferro
rod,
you’ll
be
using
friction
to
generate
heat
which
will
turn
into
a
tiny
ember.
To
pull
this
off
you’re
going
to
need
a
few
components
made
out
of
dry
wood
found
around
you,
as
well
as
elbow
grease.
Be
warned,
it
can
be
a
tiring
process.
To
use
a
bow
drill
involves
spinning
a
dowel-shaped
piece
of
wood
until
a
depression
is
formed
where
the
heat
can
be
contained.
Keep
applying
the
pressure
and
you’ll
see
smoking
starting
to
rise
up
from
the
wood
you’re
working
on.
Once
you’ve
created
enough
heat,
an
ember
will
be
formed
in
the
depression
you
were
working
in.
This
is
a
very
tiny
ember
that
can
easily
be
put
out,
ensuring
you
have
a
tinder
bundle
made
of
grass
or
tufts
of
fibrous
bark
to
put
your
glowing
ember
inside
will
prevent
it
from
going
out.
Using
Fire
To
Your
Advantage
Fire
has
an
abundance
of
uses
beyond
keeping
you
warm
and
able
to
cook
for
yourself.
You
can
use
fire
to
create
tools
and
items
that
can
make
it
easier
for
you
to
survive
in
the
woods
or
even
help
you
get
help
in
a
survival
situation.
Signaling
For
Help
Using
your
fire
for
this
purpose
is
generally
something
you
would
do
in
a
survival
situation.
It
involves
building
three
smoky
fires
(using
leaves
or
duff
from
the
forest
floor)
in
a
triangular
pattern
on
the
ground.
This
is
the
international
symbol
for
distress
and
is
a
great
way
to
get
the
attention
of
any
planes
or
other
passerby
hikers.
Making
Char
Cloth
If
you
have
any
old
jeans
or
linen
hanging
around
then
you
have
an
incredible
opportunity
to
make
some
char
cloth.
Char
cloth
is
where
you
can
take
natural
fibers
such
as
cotton
in
the
form
of
jeans
or
linen,
even
scraps
of
jute,
cutting
them
up
and
heating
them
in
a
metal
container
until
they
become
a
form
of
charcoal.
This
burnt
material
ignites
with
a
spark
and
can
create
an
ember
to
put
in
your
tinder
bundle.
It
allows
you
to
reuse
old
materials
and
have
a
backup
method
for
creating
a
fire.
Avoiding
Setting
The
Forest
On
Fire
Fire
safety
is
still
a
factor
outside
in
the
woods
and
all
precautions
should
be
taken.
You
are
creating
a
fire
in
a
forest
of
flammable
objects
so,
along
with
some
common
sense,
here
are
tips
you
can
use
to
keep
you
and
the
woodland
safe:
-
Ensuring
that
your
fire
is
put
out
if
you’re
going
to
be
away
from
it
for
an
extended
period
of
time
is
crucial
to
avoid
root
fires.
Roots
in
the
ground
can
catch
fire
for
up
to
6
months
after
a
fire
has
been
“extinguished”.
The
fire
travels
along
the
root
system,
and
can
catch
trees
up
to
a
mile
away
on
fire.
This
is
a
common
cause
of
fires
due
to
negligence
in
the
outdoors. -
Saturating
the
ground
is
the
best
way
to
make
sure
your
fire
is
out.
You
want
minimal
(if
any)
heat
coming
off
the
fire
site
when
you
are
done.
There
must
be
no
steam
coming
off
the
ash
pile. -
Don’t
burn
your
fire
close
to
any
overhead
branches.
If
the
tree
is
dry,
dead,
and
lingering
over
your
flame,
there
is
a
chance
you
can
catch
it
on
fire.
Shelter
Once
you
have
your
water
and
fire
situation
sorted
out
you
can
get
to
work
on
building
a
shelter
to
keep
you
safe
from
the
elements.
Shelters
consist
of
a
walled
enclosure
and
some
basics
like
a
bed
to
rest
when
needed.
The
possibilities
for
creating
a
shelter
are
endless;
however,
you
can
narrow
down
the
type
you
need
based
on
the
environment
and
situation
around
you.
Tarp
Hands-down
one
of
the
most
versatile
pieces
of
gear
to
have
in
your
loadout,
a
tarp
can
be
pitched
in
a
variety
of
ways
and
provides
all-around
protection
from
the
elements.
A
10
foot
by
10-foot
tarp
can
pack
up
small
and
provide
a
lot
of
floor
space
if
set
up
within
the
trees.
Try
to
pick
one
out
that
has
multiple
tie-out
points
for
maximum
stability
and
configurations.
Quinzee
Not
to
be
confused
with
an
igloo,
a
quinzee
involves
piling
a
large
amount
of
snow
into
a
mound
that
should
be
taller
than
you.
After
a
period
of
setting,
an
entrance
is
tunneled
out
that
goes
into
the
structure.
Since
snow
is
an
excellent
insulator,
a
quinzee
is
excellent
for
blocking
out
the
elements
and
keeping
the
heat
inside.
It
is
designed
as
a
temporary
structure
and
after
a
few
days
of
using
it,
you
will
notice
a
loss
of
insulation
as
the
air
gaps
in
the
snow
disappear.
Snow
Trench
Snow
trenches
are
excellent
shelters
when
the
show
is
deep
and
dense.
It
involves
digging
down
into
the
snow
and
creating
a
small,
winding
trench
that
leads
to
your
sleeping
area.
Build
up
the
sidewalls
and
use
something
like
pine
boughs
(or
a
tarp)
to
cover
the
top
of
your
sleeping
area.
The
winding
tunneling
is
used
to
diffuse
wind
gusts
which
helps
keep
the
heat
in.
The
following
structures
can
be
used
in
almost
all
situations
and
are
designed
to
be
easy
to
build.
If
the
weather
is
nasty
out
you
want
to
make
sure
that
you
can
get
sheltered
as
soon
as
you
can.
The
A-Frame
Shelter
This
is
usually
the
first
shelter
that
bushcrafters
learn
to
make
and
it
is
the
simplest
to
put
together.
Using
a
couple
of
large
“Y-shaped”
sticks
to
hold
up
a
sloping
ridge
pole
will
create
a
small
area
underneath
where
you
can
sleep.
The
name
A-Frame
comes
from
the
shape
of
the
structure
as
the
entrance
will
always
represent
a
capital
“A”.
Line
the
sides
with
poles
and
debris
from
the
forest
to
create
a
wind-resistant
shelter
that
can
hold
up
in
the
rain.
improvised
poncho
from
plastic
bags
and
duct
tape
The
Lean-To
This
shelter
is
similar
to
the
A-Frame
shelter
although
one
of
the
sides
is
open
and
exposed.
This
is
an
excellent
shelter
idea
if
you
are
relying
on
fire
to
keep
you
warm.
With
one
side
open
to
the
fire
and
the
other
closed
off,
the
heat
will
circulate
behind
and
around
you
to
keep
you
warm.
It
is
important
to
note
that
this
shelter
works
best
with
a
bed
to
keep
you
elevated
off
the
ground.
All
you
need
is
a
ridge
pole
between
two
trees
and
then
create
a
nice
wall
behind
you
with
long
wooden
poles
and
debris.
Places
To
Avoid
When
Setting
Up
A
Shelter
-
Avoid
low-lying
areas
in
cold
temperatures.
Don’t
make
your
bed
in
a
gully
or
other
depression
as
cold
air
falls
to
the
ground
and
can
make
you
cold
through
the
night. -
Don’t
make
camp
in
a
swamp
or
marshy
area
as
they
are
prone
to
having
wet
ground
and
flooding,
especially
after
a
rainfall. -
Watch
out
for
widowmakers
(precarious
branches
that
could
fall
and
damage
your
shelter
and
you)
as
wind
storms
tend
to
jar
them
loose
from
the
tree
they’re
attached
to.
Food
A
high-calorie
intake
is
vital
when
you’re
out
in
the
woods.
Without
it,
you
won’t
be
able
to
function
properly
and
that
is
a
slippery
slope
no
survivalist
wants
to
fall
down.
Emergency
rations
can
only
get
you
so
far
and
it’s
important
to
establish
a
sustainable
form
of
nutrition.
There
are
many
sources
of
food
in
the
woods
that
you
can
take
advantage
of
at
any
time
in
the
year.
During
the
spring
and
summer
months
foraging
for
wild
edibles
helps
sustain
your
diet
while
hunting
and
preservation
methods
can
help
store
food
for
those
cold
months
where
nature
has
gone
to
sleep.
Be
mindful
of
mushrooms
and
don’t
attempt
to
eat
them
without
proper
training,
or
a
detailed
guide.
Eating
the
wrong
fungi
could
spell
the
end
for
an
avid
survivalist.
Fish
Having
fishing
gear,
even
a
minor
kit
of
line
and
hooks
should
be
included
in
every
pack.
Fishing
has
sustained
civilizations
for
centuries
and
is
a
great
resource
of
omega-3
oils
and
protein.
If
you
stumble
onto
an
animal
carcass,
using
some
of
the
small
bones
to
fashion
a
J
hook
work
in
a
pinch.
Making
cordage
from
tree
bark
can
help
create
a
fishing
line
which
then
you
can
fashion
around
a
small
branch
that
acts
as
your
reel.
Find
some
nightcrawlers
for
bait
and
you
can
troll
from
the
shoreline
or
a
rock
overlooking
deep
water.
Atlatls
Much
like
those
dog
toys
where
you
can
launch
a
tennis
ball
by
using
a
wand
to
give
you
more
mechanical
leverage,
an
atlatl
uses
a
hooked
stick
to
connect
to
a
dart
or
spear.
The
idea
is
to
be
able
to
extend
your
arm
more
so
that
you
can
launch
the
object
up
to
100
yards
at
startling
speeds.
Primitive
hunter-gatherers
used
atlatls
for
small
and
large
games.
Snares
and
Traps
If
you’re
hunting
small
game
such
as
rabbits
or
squirrels
then
a
snare
or
trap
might
work
better
for
the
survivalist
out
in
the
woods.
Wire
snares
are
popular
for
hunting
rabbits
as
you
can
set
them
up
within
runs
that
the
animals
have
been
using.
Thin
wire
makes
it
almost
undetectable
for
the
creature
to
notice
until
it’s
too
late.
Remember
to
look
up
the
trapping
regulations
for
the
area
that
you
are
in
as
some
require
that
you
have
a
specific
license
for
trapping
in
that
area.
You
also
wouldn’t
want
to
encroach
on
someone
else’s
trapping
line
as
it
could
interfere
with
their
traps.
Deadfall
Traps
Do
you
have
a
pesky
mouse
problem
in
your
shelter
or
are
you
looking
to
get
some
extra
calories?
Look
no
further
than
a
deadfall
trap
for
all
of
your
mice
hunting
needs.
This
easy
to
create
trap
consists
of
a
large
rock
that
is
supported
by
sticks.
The
idea
is
to
bait
the
trap
so
that
the
mouse
triggers
the
sticks
to
move,
thus
dropping
the
rock
on
the
unsuspecting
critter.
Be
wary
of
hantavirus
in
mice
as
it
can
make
you
very
sick,
quickly.
Eating
mice
isn’t
recommended
unless
completely
necessary.
Ensure
that
you
cook
the
rodent
thoroughly
and
dispose
of
any
guts
that
you
take
out.
Defense
and
Predators
If
you’re
surviving
in
the
woods
you
will
most
likely
come
across
predator
animals
from
time
to
time.
Bears,
coyotes,
and
wolves
are
the
apex
predators
of
the
forest
in
much
of
the
United
States
and
luckily,
they
don’t
like
to
bother
people.
Some
are
unnerved
by
the
haunting
howling
of
a
pack
of
wolves
or
the
noisy
rummaging
of
a
black
bear
in
some
blueberry
bushes,
but
that’s
just
life
at
work
in
the
forest.

in
sheath
next
to
log
Black
bears
in
particular
are
not
aggressive,
and
in
fact,
are
curious
by
nature.
The
only
time
you
will
generally
come
across
aggressive
bears
is
if
they
are
mothers
protecting
their
cubs
or
habituated
bears
who
have
been
fed
by
humans
for
a
long
time.
Otherwise,
a
nice
fire
and
maybe
a
bang
or
two
on
some
metal
will
have
them
scampering
away
from
your
camp.
If
you
want
to
have
a
can
of
bear
spray
with
you,
that
is
also
a
good
choice
for
deterring
multiple
animals.
However,
with
limited
usage
and
an
expiry
date,
it
is
only
a
temporary
solution.
Another
popular
item
is
an
air
horn
for
animal
deterrent.
Dealing
with
wolves
is
almost
the
same
as
bears,
although
if
you
have
a
dog
with
you
they
have
been
known
to
try
and
lure
the
animals
away
from
unsuspecting
owners.
Having
a
big
fire
and
making
lots
of
noise
are
excellent
deterrents
for
predators.
It
is
of
paramount
importance
that
you
store
food
away
from
your
camp,
and
preferably
hang
up
in
a
tree
away
from
reach.
A
hungry
animal
will
always
investigate
potential
food
sites
and
that
can
have
a
negative
impact
on
your
forest
experience.
machete
next
to
its
sheath
next
to
a
log
in
the
bush.
Basic
Gear
For
Woods
Survival
Here
is
a
list
of
inexpensive
gear
that
you
should
have
in
a
kit
that
can
travel
easily,
even
if
you
are
surviving
out
in
the
wilderness:
-
Sturdy
backpack -
Compass
(one
with
a
signal
mirror
included
is
best) - Tarp
-
Ferro
rod
and
striker
(plus
matches) -
Safety
Whistle -
Water
purification
tablets
and/or
personal
water
filter -
Duct
tape -
(Hand
crank)
flashlight -
Some
tinder
in
a
zipper
bag -
Knife
(make
that
two
knives)
or… -
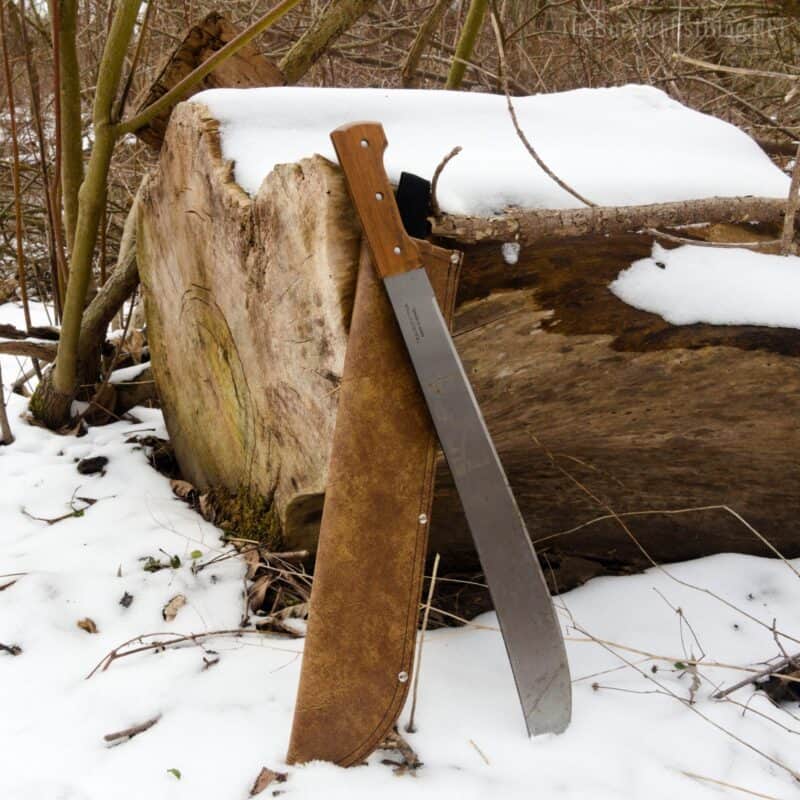
A
machete
plus
a
survival
knife -
Saw
(the
hand
crank
kind
is
smaller
and
lighter) -
Hatchet
or
axe -
Metal
cup
or
pot -
Compact
camping
stove -
Harmonica
(for
morale) -
Solar
or
hand
crank
headlamp
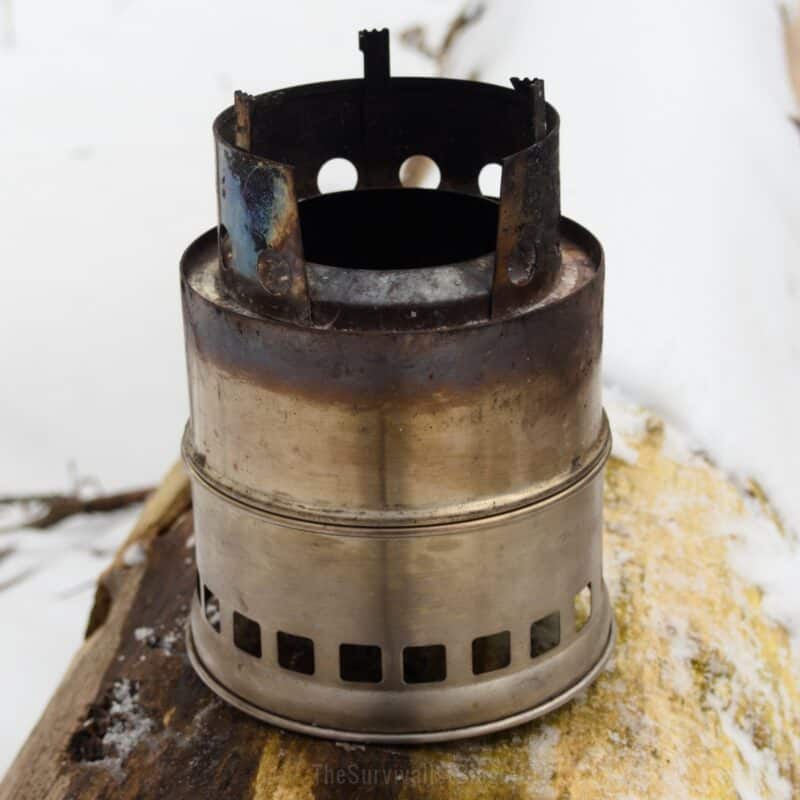
twig
stove
assembled
that
I
use
while
in
the
bush.
Surviving
In
The
Woods:
Is
It
For
You?
Living
in
the
woods
has
been
romanticized
through
movies
and
social
media
campaigns,
but
the
truth
is
it’s
not
all
glamour
shots
and
stress-free
living.
Being
free
from
societal
grips
means
taking
on
nature
itself
in
a
battle
for
survival.
Once
you
have
systems
in
place
and
have
understood
the
rhythm
of
the
seasons,
it
frees
you
up
to
experience
true
freedom.
Restrictions
and
property
ownership
are
important
to
be
aware
of
if
surviving
in
the
woods.
In
the
United
States,
you’re
not
allowed
to
live
in
national
forests
or
on
public
land
without
permits.
There
has
been
much
controversy
on
this
as
more
and
more
people
flock
to
a
different
life
on
the
frontier.
It’s
important
to
remember
that
surviving
in
the
woods
is
not
for
the
faint
of
heart
and
should
be
something
you
study
extensively
before
trying
it
out
for
yourself.
Easing
into
it
through
extended
camping
trips
is
a
great
way
to
get
your
feet
wet
without
drowning
in
the
responsibility
you’ll
have.
Remember,
there
are
no
amenities
out
in
the
forest
aside
from
the
ones
you
create
yourself.
updated
03/24/2022

Perrin
is
a
nomad
surviving
and
thriving
in
in
the
Canadian
forests.
His
areas
of
expertise
include
wilderness
survival,
primitive
living,
tracking
wildlife,
and
teaching
others
about
this
way
of
life.
He
has
has
a
“first-responder”
certification
and
is
a
“leave
no
trace”
expert.