
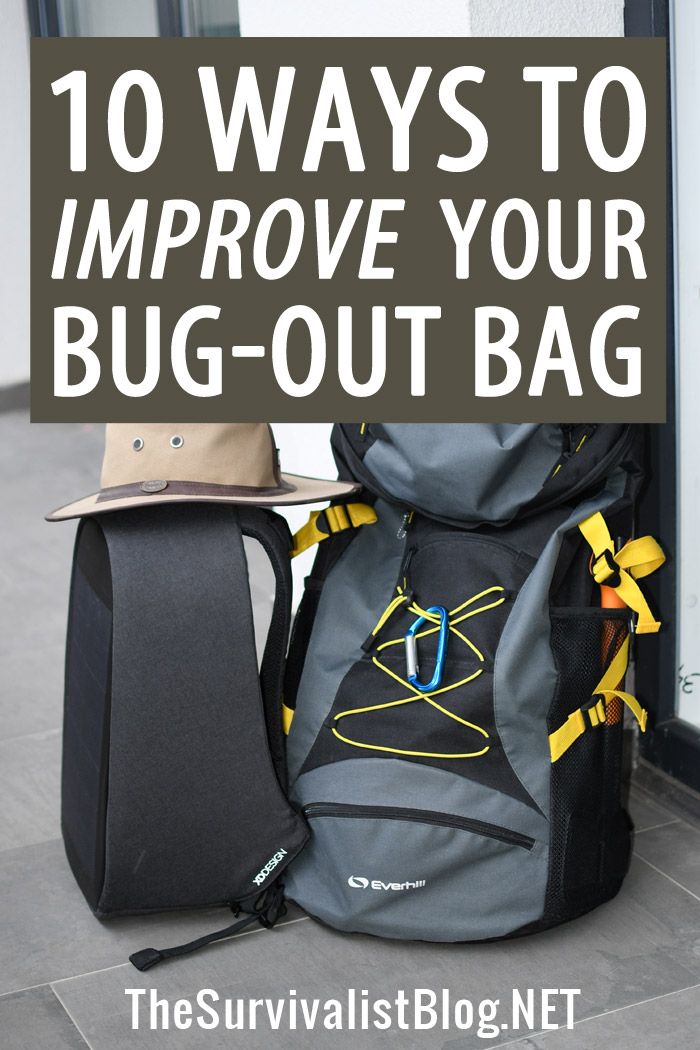
10 Ways to Improve Your Bug-Out Bag
You might think if you have been prepping long enough that you have your bug-out bag and its load out completely perfect. Down pat. Ideal.
Maybe you do, and will end up proving me wrong, but I will still go on and assert that there is always something you can do to improve your BOB itself, or just the way you have your kit stashed in it.
You can modify or optimize your bag and it’s loadout to better weatherize it, to carry more cargo, or to make it more efficient all the way around.
And no matter how slickly you have packed your gear or how feature-rich the backpack itself is, chances are there are a few essential flaws with the pack itself that you can remedy. We all have those nagging things about our BOB’s that annoy us.
Those annoyances can turn into aggravation after a long time on the road. With enough wear, tear and bad luck they could turn into failure points that can derail us while we are on the trail or escaping from some disaster.
There is perhaps a day in the future, and I hope it is awfully far away, that you might really be depending on your BOB. Don’t put off making it the best it can be any longer. In today’s article, I will show you 10 ways to improve your bug-out bag that will work for almost any bag and any kit.
Table of Contents
What Do I Mean By “Improve”?
In my experience most people think of physically hardening or improving the durability of their backpack when I bring up improving the BOB itself. That is certainly one option, but it is also not generally what I’m talking about.
Besides, aside from waterproofing there is not much else you can do to increase your backpack’s durability. Many modern packs are made from heavier weights of nylon that are extremely difficult to sew without specialized machines.
The improvements I’m talking about are in the department of capability, contingency planning, load-bearing ability and efficiency.
Many of them are little things that are more adjustments than material improvements but when taken all together or even just a few at a time can result in a significant quality of life enhancement for you, the person carrying the pack and using the contents.
You should not underestimate any of these enhancements, no matter how trivial you might think they are.
A considerable amount of collective experience, often paid for and sweat, tears and blood, has informed these tips and recommendations that I am about to share with you.
I promise when you are carrying a backpack that weighs many tens of pounds over difficult terrain in the middle of a life-threatening situation you’ll be glad for every shred of comfort, efficiency and durability that you can get out of it.
You won’t even necessarily have to buy anything to implement several of these enhancements. You just need a little bit of know-how and perhaps some practice and DIY ingenuity, and you can make it happen. Now, let’s get on to the list.
#1. Cut Weight
Weight is never your friend when you have to carry it. You must always justify every gram, every ounce, every pound of gear against the weight limitations of both yourself and your pack, and of your energy budget.
Saving a few ounces here, and perhaps a pound or two there, will certainly not feel like much as soon as you don your pack, but I can guarantee you that it will make a big difference when you were a lot farther down the trail.
How do you cut weight? The first and easiest way is to go over your packing list again and again, ruthlessly ridding yourself of things that are superfluous or only useful in fringe or extreme situations.
Next you can rifle through the contents and cut loose items that serve a purpose that can be taken care of by another item that is a dual-purpose piece of equipment.
Lastly, if some things are just too daggone heavy to put up with but too valuable to get rid of you might consider purchasing a newer, lighter replacement for it.
If you can shave 15, 10 or even five pounds off of the total weight of your BOB that is an enormous improvement! Even five pounds will start to feel like 50 near the end of a very long march over rough terrain and in bad weather. Never put up with a heavy load if you don’t have to!
#2. Silence and Stifle
This is a big pet peeve of mine that many preppers don’t even pay a second thought to. Your average BOB is a noisy contraption!
Banging, clanging, grinding and clanking all over creation and back. Before you write me off as some lunatic or busybody you cannot stand a little noise, hear me out.
A noisy backpack can get you killed. Ask anybody in the military. You don’t have to be a snake-eating Special Forces soldier for your noisy BOB to be a major liability.
Dealing with that ruckus on your back is not merely an annoyance; that noise can attract the wrong kind of attention from people that you do not want to run into or easily lets them follow you from out of sight.
In a real SHTF situation, being discreet and staying hidden could become very important indeed.
A noisy backpack can also muffle your own hearing with background noise, preventing you from detecting auditory cues that can tip you off to all sorts of dangers, be it the rumble of an engine or the distinctive snick of an AK safety being moved to the ‘off’ position.
There is no such thing as a BOB made too quiet. The quieter the better, and silence is indeed golden in this regard. You can use your own pack’s clothing, blankets and other soft, insulating items to prevent collisions inside the pack between two noisy pieces of equipment.
You can also pack down, strap down and isolate any offending piece of gear until it is not making any more noise. Take the time to do short test runs with your pack before stopping to adjust things until no more major sources of noise remain.
#3. Have Backups; Redundancy Saves Lives
I don’t blame you if you want to drag me behind the woodshed for a good thrashing right about now:
I just finished harping on you about cutting as much weight as possible at any cost and here I am telling you to carry even more crap, and especially more of the things that you are already carrying!
Well, as the old saying goes you can prove any rule by its exceptions, and this is no different.
Some items that you will carry with you as part of your survival complement are just too valuable to risk consuming, losing or breaking. Many of them, as luck would have it, are already quite compact and lightweight.
This is essential, fundamental life-support equipment I’m talking about here, things like fire starting materials, water sterilization tabs or filtration equipment, an extra magazine for a firearm that requires it, a backup compass, extra batteries and so on.
Even larger and bulkier items might be made redundant by carrying an alternate piece of equipment that also serves multiple uses as I alluded to above.
One great example is a lightweight tent or bivy which is a popular component of virtually every prepper’s equipment.
I would not advocate you carry an entire spare tent with you, but what kind of shelter could you pull off using a good waterproof tarp with sturdy grommets and some paracord? You would probably do okay, don’t you think?
The items you cannot afford to be without should be duplicated in the most efficient and compact way possible. You’ll be glad you did, trust me.
#4. Waterproof It!
As much as you wish it were not so, you will not always be carrying your BOB on a fun, easy adventure with perfect weather: a cool and breezy 69 degrees under crystal clear blue skies where only the occasional giant, puffy, cotton candy cloud rolls across the vista.
No, Mr. Murphy, of Murphy’s Law fame, will get a vote in the proceedings, and chances are it will be raining pitchforks and cannonballs when the time comes for you to bug out.
If you let your BOB get completely soaked there is a serious chance that certain items inside will be completely ruined, to say nothing of the fact that your BOB is going to get several pounds heavier.
Water is heavy. Water is also highly destructive, especially to electronics. Even things which are not destroyed by water can be degraded and eventually ruined by it, since water invites mold, fungus and other nasty microorganisms to grow.
You can easily protect your BOB with a simple, no-frills rain cover, often called a rainfly. Some packs even have one built in.
These nifty devices are typically made of a lightweight rain-repellent synthetic material and have an elastic band all around the edge that allows you to secure it around the entire BOB in no time flat.
You can get a little more survival mileage out of your rainfly by choosing one that has environment specific camouflage on one side and a high-visibility green or orange color on the other for long-distance signaling.
There are other ways to waterproof your BOB, but none as all around effective as a rainfly. Some of the old-timers used beeswax or other natural water repellent materials, but these do wear out, must be reapplied periodically and are very messy.
#5. Add Hydration Capability
I have absolutely no doubt that you probably already have an assortment of water bottles, canteens, thermoses and other containers suitable for carrying quantities of water and drinking from.
Your BOB also likely has the storage capability on the outside of it specifically for these containers.
That is great and will certainly help you move them across a great distance, but it does not make the water easy to access while you are wearing the backpack and are on the move.
You can save yourself time and energy by equipping your backpack with a hydration bladder. These flexible pouches, popularized by Camelback and Blackhawk among others, feature a long flexible hose with a straw-like valve on the end that allows you to drink from the bladder while it is stored in your backpack.
For rehydrating while on the move, nothing is faster, more convenient or easier.
Many modern backpacks feature compartments already sewn into them along with routing ports and straps for the drinking tube, but even if your backpack does not it is a simple affair to modify it to accept a hydration bladder of a given size.
You might be able to strap a pouch to the outside, place one on the inside, or simply dedicate an internal compartment for the hydration bladder itself. After this quick upgrade you will be able to sip and stay hydrated on the move without slowing down or wasting time!
#6. Upgrade Suspension or Frame
Whatever kind of backpack you have and use as your BOB the suspension along with the frame, if it has one, are perhaps the most crucial features that it has, since these are the parts that will directly interface with your body.
If your backpack has thin, crappy straps, foam padding that you can basically read a newspaper through or a flimsy internal frame that you can roll up like a cheap rug, it is time to do some upgrading, my friend.
Many modern backpacks optimized for heavier loads over longer distances will feature either an external frame or an internal structural member to help keep the load in place and stable.
If either one of these is causing you significant discomfort, or they are just not doing their jobs well you should look at upgrading them with aftermarket or custom-made units.
Neither one is particularly difficult to make if it comes down to it. Even for backpacks that lack frames or structural panels you shouldn’t settle for what it comes with if they start to bother you.
Remember, anything that is an annoyance at the beginning of your hike or movement is going to be absolutely hellacious near the midpoint and almost unendurable by the end. You need to sort these out while you can.
Don’t tell yourself to just toughen up, although you should be tough. Don’t tell yourself you will get through it, even though you probably can. A big part of prepping and surviving is a mental game, so you want to give yourself every advantage that you can get.
#7. External Attachment and Storage
Before you get the wrong idea allow me to be perfectly clear right up front: I am in no way advocating for or recommending that you hang a whole bunch of crap off the outside of your pack using every single row of PALS webbing, carabiner, bungee cord and so forth.
Aside from being insanely inefficient, unbalanced and noisy this is not the best way to make use of the available space on the outside of your pack.
Most backpacks do have at least one or even several smaller pouches or compartments that are accessible on the outside of the backpack and separate from the main compartment.
These are typically called admin pouches, short for administrative pouch, and are ideal for storing small and easy to lose items that you need to access regularly.
Small flashlights, maps, pens and pencils, compasses, multi-tools and so forth. This is definitely convenient but we can do better and save time and energy.
You should consider adding smaller, barnacle-like pouches to the straps and waist belt of your backpack if it has one.
This will allow you to access these items rapidly and with a minimum of fuss while you are wearing your backpack; no need to take it off and dig around on the inside or even access your specialty compartment.
You can grab what you need, take care of the task at hand and re-stow it, keeping yourself moving.
#8. Use Modular Packing for Success
Modularizing your BOB is not, as it’s sometimes reported, carrying several smaller backpacks or bundles attached together. It is instead a certain way of packing the contents of your BOB, specifically grouping them into like-minded “cells”, “loads” or compartments that can be removed all at once to accomplish a specific task.
This will prevent you from having to unpack the entire bag to access a single item or a couple of them and then repack it at great expense in time and aggravation.
For instance, if you simply needed your basic cooking set and some food items out of your pack you could pop out your cooking or mealtime module to have everything you need ready in one go; stove, fuel, a fire starter and tinder, utensils, fireproof vessel, etc.
Everything else in the backpack could remain and, more importantly, remain accounted for. You can use nylon zipper pouches, mesh bags, plastic freezer bags or any other type of compartment or pouch that makes sense for what you are carrying.
You will of course be losing a little bit of your internal space in your BOB to accommodate these modular couches themselves, but the speed, convenience and security of this packing method makes it more than worthwhile for the vast majority of preppers.
It also lets you easily hand off a bundle of equipment to someone in your group who might need it with little concern that they will lose it.
#9. Integrate and Protect Electronics
Many modern preppers are relying more heavily on their electronics with the preponderance of mobile power technology and electronic devices today, among them cell phones and GPS units.
This makes good sense, but if you are going to go all-in on the electronics to help carry you through some time afield or a major survival situation you should take precautions that no harm comes to those electronics and also set yourself up to make better use of them while you are on the move.
You never know what kind of threat you’ll be facing in the world during a major disaster scenario, and your basic line of defense against people who would steal from you or hurt you is a signal blocking bag, sometimes called a Faraday bag, that you can drop your cell phone into along with other sensitive electronics to prevent remote intrusions or signals tracking.
It might also afford a certain degree of protection from an electromagnetic pulse.
Also don’t forget to take special care to waterproof your electronics.
Heavy duty, gallon-size Ziploc-brand freezer bags (the kind with the traditional zippers, not those dumb sliders) are excellent, last virtually forever and form a great seal giving you extra assurance that rain or a dunk in the river will not destroy your expensive and important electronic gear.
Lastly, you can set up commonly used electronics like power banks and easy to access pouches with cable routing so that you can seamlessly draw from your electrical piggy bank while on the move.
#10. Solarize!
This dovetails with Number 9. If you are making use of electronics for survival purposes there is no reason on earth why you should not have a lightweight, compact, folding solar recharge system as part of your bug-out kit.
These devices get better and better every year, and they get cheaper for the same capability! In almost any environment on Earth, even ones that are typically overcast, you can make use of these solar rechargers to harvest the sun’s virtually limitless energy and turn it into electricity for your electronic devices.
One great way to implement these with your BOB is to keep them handy and set up attachment points using bungees to place them on the outside of your BOB while you move.
So long as the sun is in the sky you can be getting some power into the onboard battery or a separate power bank.
This is not as ideal as setting it up with the proper orientation and a line of sight to the clear sky while you are stopped, but every little bit helps and the increasingly small form factor of the solar systems makes this a more viable strategy than ever.
Conclusion
We all love our bug out bags, but just because we have it set up the way we like it does not mean that we cannot make it better: making it lighter, more convenient, more efficient and easier to carry and use.
You will want every advantage you can get when the time comes to bug out, so spend a little extra effort, time and maybe a few extra dollars on making your BOB the best it can be!
