
9 bushcraft skills everyone should know
As preppers we need to be ready to adapt quickly to changes in our surroundings. What if we don’t have time to prepare and are thrust into the wilderness with only the things in our pockets, would you be able to survive? Bruising up on our knowledge of bushcraft skills is essential if we want to be prepared for this type of scenario.
I have only covered the essentials in this post so be sure to pick up some bushcraft books and get in the field to practice the skills you’ve learnt.
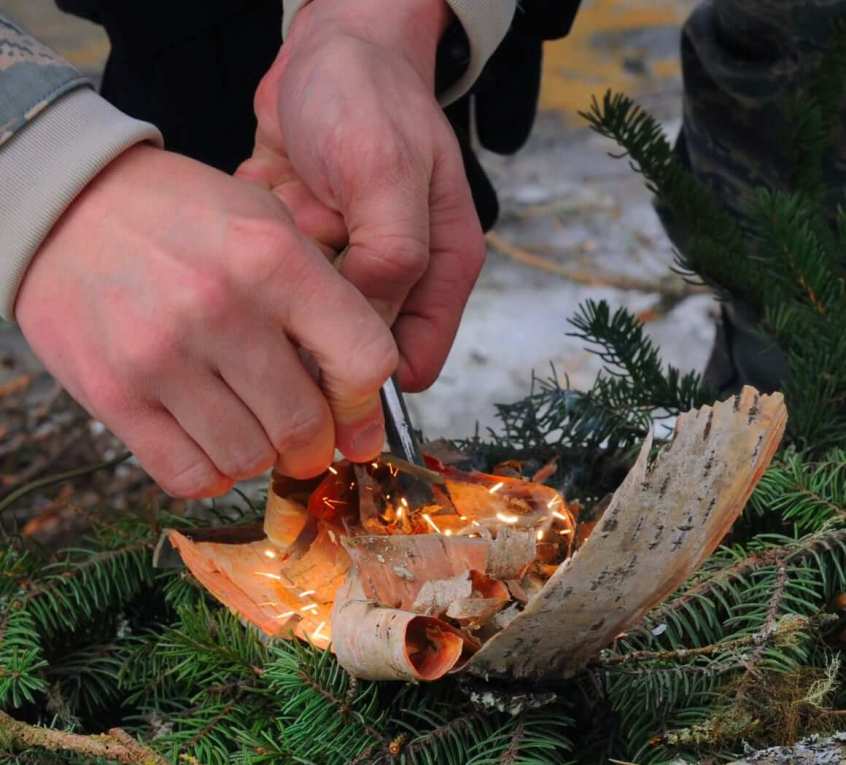
Fire starting

Staring the fire is the most important thing for survival. Of course, you don’t want to die of cold. Also, the fire would help you cook your food if needed. So, this would be the very first trick you want to know. Here are simple and common methods to start a fire.
Hand Drill

A Hand Drill is a simple fire starter best suited for dry climates. Here’s how to use it.
Step 1. Start by forming a V-shaped cut in your fire board and create a small depression by its side with a rock or knife. Fix a bark piece under the cut for catching the ember.
Step 2. Place a 2 feet spindle in the depression at some pressure, roll it in your palms, and run it speedily down the spindle. Repeat this till the spindle tip turns red and ember gets formed. II. Two-Man Friction Drill
Maintaining speed and pressure could be a task with a hand drill. It’s easier for two people, though. With a Two-Man Friction Drill, you can let one person pressurize the drill downwards and the other can rotate the spindle at a speed with a thong or shoelace.
Step 3. Tap your fireboard to get the ember deposited on the bark. Transfer it to a bundle of tinder and blow to fire.
Fire Plough

A Fire Plough can itself create its tinder by driving out the wood particle before friction. You just have to cut a notch in softwood fireboard and rub a harder shaft’s tip up and down the notch. The dust particles of fireboard forced out by friction will burn at high temperature.
Foraging edible plants
Food is vital for survival. But what would you eat when stranded in the woods ? Here are some of the common plants that you can eat.
Violets
The leaves and stem of violets are edible with a mild flavour. You can munch on them raw or cooked.
Lesser Celandine
This is a popular source of vitamin C. You can eat it only before its flowers. Do care to heat it up to destroy the toxic protoanemonin compound.
Annual Honesty
This belongs to the mustard family. You can eat its young leaves, flowers, and seed pods. They have cabbage-like flavour.
Field garlic
The taste of field garlic is a yummy blend of garlic and onion. They are small and you need to collect some to fill yourself.
Primrose
Primrose has a rosy odour and taste. They are also used in wines and can be a good food option.
Lungwort
The Lungwort leaves are much like a well-cooked spinach. You can eat the flowers with a fresh taste.
Daisies
These can be a bit bitter but you can eat the greens and the petals.
Garlic Mustard, Lemon Balm, Elderflowers Dandelion, Stinging Nettles, Purple Dead Nettle, and Ground Elder are other options as edible plants.
Navigation

Navigation can be difficult without a compass. You have to depend on natural elements to serve the purpose. Let’s find out how.
The Sun can help you in getting your directions. If the sun is setting, it’s easier. The direction of setting is your approximate west. With that, you can approximate your north and south as well Same goes with a rising sun.
If you’re trying to navigate at midday, you need different tricks to understand the motion of the sun. First find a stick more than 3 feet long. Fix the stick on a ground in an area free from shadow. Now, place a stone at the point of the stick’s shadow. Next, wait for about 20 minutes and the shadow’s length would change. Now Place another stone at the tip’s new location. You can do this once more if needed, draw a line connecting the positions of stones, the last stone marks you east and the first is your west. Drawing a perpendicular line to this would give you north and south as well Alternatively, you can place your left and right foot on the first and last stone respectively. This way you’re facing north.
Shelter
We all need shelter for protection. It saves us from the adversities that nature can throw at us anytime. It can rain or snow or anything else depending on your location. Here are the best methods of creating a shelter for you.
Simple Frame and Tarp Shelter

If you’re lucky enough to carry a tarp, you can get an amazing shelter. Create a frame by leaning some poles on a branch or trunk of a tree. Make sure your tarp can fit this frame. Be sure to avoid any sharp edges that may puncture the tarp. Tie a rope between any suitable couple of trees and wrap your tarp over it. Fix the sides by placing some rocks.
For an emergency, you can avoid the frame and cover yourself in a poncho. Now, you just need a cosy corner to hide for the time being.
Simple Body Heat Shelter

For an emergency short-term shelter, this can be your simplest saviour Use any or several forms of debris from around to form a mound and frame it with large sticks. Now you can crawl into it by digging a hole of adequate size. Cover the open block. Your body heat trapped in your shelter would keep you warm. You can even use snow for the mound as despite being cold the snow insulates you from outer temperatures.
Open Shelter

Open shelters are as large as to accommodate four or even more people depending upon the resources available. Also, it can save yours from wind, rain, etc. Look for low branches to support the ridgepole (topmost point). If a single tree is available, make it your ridgepole. If you find two trees, bridge them with a strong branch. Lean about 5 to six poles at 45-60 degrees angle. This would be your grid. Next, form flexible arms between the poles at 90 degrees and use leafy branches or bark to get the roof thatched. Have a tarp? You can hang it through the opening as a curtain.
Knife maintenance

Your knife is an essential tool. It’s very important to keep it intact and in working condition. Everything breaks at some point and you don’t want your bushcraft or survival knife to vanish when you need it the most Why not know how to maintain it? Need to cut some logs? Never strike your knife with a hammer for the purpose Its a knife, not an axe. This is only going to weaken and eventually destroy your knife. Many knife makers would promise their knives to be strong enough for battening but you can’t risk an all-important survival tool for that. If it’s only about small log pieces, go for it at your own risk.
Water purification
You need water for sure else forget surviving. Now we all are aware that outdoors waters is most probably full of bacteria’s, viruses, and other germs. How would you get a clean water fit for drinking? A few simple purification methods are explained below.
Boiling

Boiling is the easiest purification trick for water it kills all the pathogens in your water Maintain your boiling for at least 5 minutes. Just get a pan, start a fire, and boil your water.
Iodine / Chlorine treatments
This is the most effective way to purify your water, the method can take some time and leave an aftertaste. It can clean your water and remove sediments as well. Don’t use this water regularly if you have a thyroid problem.
Water Filter
- Find a small bottle or container (Even birch bark or bamboo can be used)
- Cut a small hole in the bottom.
- Stuff a piece of cloth into the bottom. You don’t need it too tight; you just want it to cover the hole so the charcoal doesn’t wash out.
- Pour 3 or 4 inches of filter material. In this case I used crushed charcoal .
- Cover with another plug of cloth.
- Fill with water.
- The first bit of filtrate will have a lot of charcoal powder. Discard this.
First aid

Let’s have a look at some common issues where you need first aid and how to provide it
Shock
To prevent shock due to injuries, restore breathing first. Keep the patient warm and sheltered. Next, stop the bleeding and provide suitable aid for the injury.
Stopped breathing
For stopped breathing, use mouth to mouth resuscitation. Open the airway and left the neck. Pinch the nostrils avoiding air leakage and blow his mouth with yours while checking for chest expansion. When done, listen to the air leaving his lungs and chest should fall.
Bleeding

In case of bleeding, elevate the wound above the heart and use a clean cloth to apply pressure. Pressurise the pulse point between the heart and the injury if bleeding continues.
Fracture
Treat it as a fracture even if doubtful. Splint both joints above and below the injury. Do pad the splints. Make sure the circulation is intact and dress with a clean cloth.
Animal tracking
Animal tracking is another important aspect of surviving the wilds. Many of these animals can be a threat to your life and hence you need to be a good tracker as well. Here are some of the signs that let you track animals down.
Large-scale signs
These are the signs of an animal’s presence that you get from the environment. The first would be the landscape. Animals have their own behaviours and habits and by those, you can track them. Signs can be the type of cover, water resources, transition areas, trails, runs, escape areas, sleeping areas, beds and lays, feeding areas, eat through, patched, etc.
Medium-scale signs
Medium scale signs give more reliable signals about animal’s presence. These may include gnaws, rubs, ground debris, chews, scratchings, above ground marks, upper vegetation breakage, feathers, kill sites, bones, scat, etc.
Small-scale signs
These signs are harder to understand. These might cover dust, grits, or compression on a surface. Because animals might leave these particles while walking through.
Basic Knots
Knots hold high importance among your survival skills. They can help you with shelter, climbing and many other life-saving things. Here are the important ones to learn.
Square Knot
It’s a conventional knot. It acts as a binding agent and is tied against a curved surface. Its commonly found in shoelace ties. For you, it can keep your bundle of wood tied.
Clove Hitch
First of all its really easy to tie this one It works well to get a quick tie, especially for rough surfaces. But just so you know, there a high chance of slip with this if used on smooth surfaces. Use it with caution and make sure that you maintain the pressure on the line.
Bowline
This one is the most basic knot. You can tie it quick and easy. This line is very secure so it wont slip. Furthermore you can also use it to make a loop. It connects two lines together or a jib sheet to the clew.
So that’s our 9 bushcraft skills everyone should know, Remember to practice whenever you can because you never know when your life could depend on the skills you have learnt.